Showing posts with label DIY. Show all posts

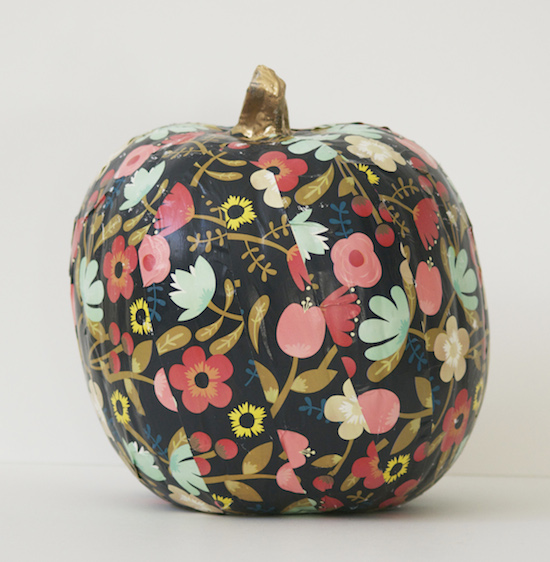
Halloween: Our Top Pumpkin Picks!

Sunday, 18 October 2015

Autumn is well under way, and it's that time of year for pumpkins!

This year we're going to share the most unusual pumpkin decorating ideas, including several 'no carve' options. 


Way back as a student on halls of residence, we carved up a Voldemort, Pikachu and Princess Peach pumpkin. There are so many templates online to have a go at, and it's so much fun! Just search 'pumpkin carving templates,' pick up a carving kit from your local supermarket and GO!


This year however, we're keen on the no-carve pumpkin trend! It's time to step up your pumpkin game...

Who says Halloween can't be pretty?!

1. This DIY tissue paper pumpkin (found here)


4. Did someone say OMBRE pumpkins? (Click here)


Will you be pumpkin decorating this year?!

Viva La Hama!

Saturday, 3 October 2015


'Fess up, who remembers playing with Perler beads as a child? I probably have a photo of myself tucked away in the attic, pegboard carefully balanced on knee and the look of utmost concentration on my face - as if placing each colour in the exact right spot were a life or death situation. 

This month I decided to get playful, combining modern geometric pattern, colour and design with the childhood nostalgia of Perler beads.

If you follow me on Instagram, you may have already seen my patchwork of Perler hexagon coasters.


The clashing patterns and colours makes my heart race. Eek!

I will be adding up custom sets on Etsy veeeeery soon (because these are SURE to brighten up your house on a rainy day and get your visitors talking!).

If you want to rediscover this childhood classic and have a go at some designs yourself, you can get a whole range of colours from Amazon. Even ones you couldn't imagine getting in the 90s, like neon pink! 

Show us your creations in the comments or tag us on social media with #vivalahama! 

Quick 15 Minute Felt Banner

Wednesday, 13 May 2015

...I'm baaaaaack!

This week instead of posting something boring like an update, I thought I'd share a quick and easy DIY banner. These are perfect for brightening up your little one's room, for parties or just to have around the house!

I went for more typical unisex colours, which kind of reminds me a little of a superhero theme!


+ + + + + + + + + + 


SO, WHAT DO YOU NEED?!

Literally all you need to make a DIY banner is:

- Twine
- Felt (available from most craft stores)
- Glitter felt (optional - but you can get some from Josy Rose online)
- A little Pritt Stick and some Superglue (preferably Loctite)
- Some washi tape for hanging
- Scissors

1. Cut out your felt overlay:
This is the grey part, that is most of the banner you can see! It's easiest to do this first because then you can stick it to your mounted back. I didn't draw it out first, I just let go with the scissors and cut! I did this deliberately because I wanted it to have a real handmade, authentic feel and if I drew it out, I knew I would end up measuring and making sure it was even; that really wasn't the look I was after.

2. Cut out the base backing: 
For ours, I used some metallic kaleidoscope glitter fabric. To attach it to the back, I didn't want to use stitching but this is completely down to what you prefer, I first used pritt stick (a craft classic!). Then once I stuck it to the base, to make it extra secure, I used a little super glue on the edges.

NOTE: DO NOT GLUE DOWN THE TOP TWO CORNERS WHERE YOU WILL BE PLACING HOLES FOR YOUR HANGING. IF USING SUPER GLUE, BE EXTRA CAREFUL. YOU ONLY NEED A LITTLE (SO IT DOESN'T ABSORB THROUGH THE FELT); SUPERGLUE AND FELT CREATES AN EXOTHERMIC REACTION SO IT CAN GET HOT.

I'm sure this is a given, but if you're making banners with your tiny humans, make sure this part is done by a grown up! 

3. Cut out your letters and attach:
I cut mine freehand but if you're not comfortable with that, it's easier enough to draw out a template to cut around. When sticking I found I didn't need any super glue for this part, you can just use your own judgement as to whether you feel it needs to be extra secure.

4. Make the holes in the top two corners:
This is the hardest part! To do your holes, you can try using a punch, but the ones I had weren't strong enough so I had to do it by hand using scissors. As it's hard to get a clean cut, for this part I cheated, just to make sure it didn't look too messy - I cut out a couple of little grey triangles to cover the holes on the front and on the back, made some cute little grey hearts.

5. Cut a length of twine/ribbon and tie through the holes:
This bit is fairly self explanatory. Once you've done this, if you're going to add little patches, add them now! I just used superglue for mine, to make sure they don't come off as the twine moves when putting up or taking down.

6. Finally - fix down the corners!


Extra notes - if your banner is a little weighty, you can use a heavier twine or simply adjust the length until it sits how you like.


To put up, just add a little washi tape and voila!

Have fun getting crafty, and see ya next time!

DIY: Cheap and Easy Five Minute Pegs!

Monday, 16 February 2015


The weather is getting better, plants are starting to appear and it's time for that dreaded spring clean! However, if you're anything like me, you've just paid off a bunch of bills and don't have a lot of spare cash.

One of my current favourite DIYs are these super easy and cheap magnetic pegs, perfect for pinning up important letters, things you need but constantly lose or your little one's drawings. You can make them as decorative or simple as you like, using paint, washi tape, buttons and resins. 


I'm quite minimalist in my style so I went for a simple colour block in my absolute favourite colours - bright pink, mint and gold. I used spray paints, due to their relative ease and affordability. I'm going to be planting soon and have a bunch of tin cans ready for me to paint up, so spray paints are always super handy to have around the house to add a quick splash of colour to otherwise plain bits and bobs. 


Another good colour choice would be copper. Copper accents are currently my absolute favourite and Rustoleum do a reaaaaally good copper spray paint. I used gold for these as my copper paint is currently running low, but you can't go wrong with any splash of metallic!


To do this, literally all you need are:

- Wooden pegs (which can be found at your local pound shop or supermarket)
- Magnets (optional) 
- Paint, washi tape or other embellishments

I put magnets on the back of mine so I can pin them on my fridge and boiler, but another quick and easy alternative is to hang some twine or pretty ribbon up and clip them on. 


Know any other good cheap organisation DIYs? Leave your suggestions below in the comments!