Showing posts with label lifestyle. Show all posts

A Short Trip to Newquay, Cornwall

Sunday, 9 August 2015

It's almost Monday, so I decided there would be no better time than to settle down and write.


In June, the two of us set off to Cornwall for four days for a little break away. We saw a Groupon for a three night hotel stay and impulsively decided to snap it up. In hindsight, it would have been better planned, but I don't regret it. It was sunny on three of the four days, and the trip proved that you don't need to travel far or go somewhere exotic to enjoy new surroundings and find picturesque spots. There are some beautiful places in England too, and Cornwall is one of them.


First off, I'm not a fan of being negative, but the hotel itself wasn't a great decision. We paid for a seaview room and it was completely overpriced for what it was - the room was small, stuffy and outdated, and the interior of the hotel itself was massively in need of an update. When we arrived, the door was locked (even though it was only 7.00pm) and when we were eventually let in, the foyer smelt badly of smoke and we were met by a drunk and abrasive woman. If I had actually read the reviews beforehand I would have seen similar experiences by others, but what's life without a little risk sometimes? I'm not going to name where we stayed but although it was disappointing, it was in a great location by Porth beach.


I spent waaaay more time relaxing than I did anything else - the first night we went on a short walk, on day two we went and explored the area, day three was spent on the beach getting some vitamin sea and on the last day, we had a six hour travel back so weren't really able to do much. 


We REALLY wanted to visit the Eden project because we've never been before and it's somewhere both of us have always wanted to visit, but we didn't really have enough time (and we were too exhausted!). I'm not disappointed we didn't manage to get there because it was still super nice just to have a few days somewhere different and get a little space, but it's still firmly on my to visit list! 


Oh, and is it just me, or are those rocks reminiscent of the Loch Monster?! 

This May we're crushing on...

Thursday, 14 May 2015


This week I decided to make a board on Pinterest for one of this summer's hottest trends we're loving, flamingos and pineapples!

Here are some of my favourite picks:

1. This DIY Pineapple night light from ABM - SWOOOOOOON! (Find it here)


2. These cute flamingo fairy lights! (Find them at: http://www.suicidalshop.fr/)


3. This WEDDING pineapple! (Yep!)


4. This photo of a suuuuuper bendy flamingo!


5. This pineapple inspired ensemble! (http://www.studiodiy.com/page/3/)


6. This flamingo swim dress!


You can view the rest of the board here: https://www.pinterest.com/auberginefox/may-crush-flamingos-and-pineapples/

We'll have some pineapple and flamingo themed pieces hitting the store soon!


Quick 15 Minute Felt Banner

Wednesday, 13 May 2015

...I'm baaaaaack!

This week instead of posting something boring like an update, I thought I'd share a quick and easy DIY banner. These are perfect for brightening up your little one's room, for parties or just to have around the house!

I went for more typical unisex colours, which kind of reminds me a little of a superhero theme!


+ + + + + + + + + + 


SO, WHAT DO YOU NEED?!

Literally all you need to make a DIY banner is:

- Twine
- Felt (available from most craft stores)
- Glitter felt (optional - but you can get some from Josy Rose online)
- A little Pritt Stick and some Superglue (preferably Loctite)
- Some washi tape for hanging
- Scissors

1. Cut out your felt overlay:
This is the grey part, that is most of the banner you can see! It's easiest to do this first because then you can stick it to your mounted back. I didn't draw it out first, I just let go with the scissors and cut! I did this deliberately because I wanted it to have a real handmade, authentic feel and if I drew it out, I knew I would end up measuring and making sure it was even; that really wasn't the look I was after.

2. Cut out the base backing: 
For ours, I used some metallic kaleidoscope glitter fabric. To attach it to the back, I didn't want to use stitching but this is completely down to what you prefer, I first used pritt stick (a craft classic!). Then once I stuck it to the base, to make it extra secure, I used a little super glue on the edges.

NOTE: DO NOT GLUE DOWN THE TOP TWO CORNERS WHERE YOU WILL BE PLACING HOLES FOR YOUR HANGING. IF USING SUPER GLUE, BE EXTRA CAREFUL. YOU ONLY NEED A LITTLE (SO IT DOESN'T ABSORB THROUGH THE FELT); SUPERGLUE AND FELT CREATES AN EXOTHERMIC REACTION SO IT CAN GET HOT.

I'm sure this is a given, but if you're making banners with your tiny humans, make sure this part is done by a grown up! 

3. Cut out your letters and attach:
I cut mine freehand but if you're not comfortable with that, it's easier enough to draw out a template to cut around. When sticking I found I didn't need any super glue for this part, you can just use your own judgement as to whether you feel it needs to be extra secure.

4. Make the holes in the top two corners:
This is the hardest part! To do your holes, you can try using a punch, but the ones I had weren't strong enough so I had to do it by hand using scissors. As it's hard to get a clean cut, for this part I cheated, just to make sure it didn't look too messy - I cut out a couple of little grey triangles to cover the holes on the front and on the back, made some cute little grey hearts.

5. Cut a length of twine/ribbon and tie through the holes:
This bit is fairly self explanatory. Once you've done this, if you're going to add little patches, add them now! I just used superglue for mine, to make sure they don't come off as the twine moves when putting up or taking down.

6. Finally - fix down the corners!


Extra notes - if your banner is a little weighty, you can use a heavier twine or simply adjust the length until it sits how you like.


To put up, just add a little washi tape and voila!

Have fun getting crafty, and see ya next time!

Spring Garlands We're Lusting After!

Thursday, 9 April 2015

Happy Thursday! This week we decided to post our favourite round up of garlands and bunting - the sunny weather has definitely made us in the mood to inject some colour at the Aubergine Fox Den!

We heart this Fiesta Garland by TouchOMagic on Etsy! Buy it here

You may have seen earlier our newest tassel garland made for us by Tassels and Tails on Etsy, something I've been dreaming of making for some time now but with so much work on at the minute, just never seemed to have the time. We were absolutely thrilled with it, she made it up to the exact specifications we had and it arrived super speedily! (If you haven't seen it yet, head to our Facebook page or Twitter for a little preview).

They're really easy to make and there are a lot of tutorials online (we particularly recommend this tutorial on youtube: https://www.youtube.com/watch?v=gpN2fgEH1Xg). They're also bright, fun and if you're strapped for cash, affordable to do at home yourself.

If my den were bigger (by bigger, I mean anything larger than a small one bedroom flat!), I'm pretty sure I would have a hard time stopping myself from stocking up on a huge selection of garlands. I have a respectable six or seven different ones (not out at the same time!), and constantly drool over others I want to add to the collection!

So, to relieve some of my garland fever and give myself an excuse to peruse the web, I'm going to share some of my favourites with you.

1. This scalloped gold garland from Steph Loves Ben (from £8.33). 


Scallop edges have been making a huge revival over the past few years and we still can't get enough. Combine that with glitter and our all time favourite metallic, gold, and you have a winner.

2. This rainbow felted heart garland from Azalea Cottage Crafts


My all time favourite things - garlands, felt and rainbows, what's more to love?!

3. Felt Ivory Flower Garland from Such a Squirrel


This gorgeous garland is perfectly designed for weddings, but this wouldn't stop me from adorning my home with it during the spring/summer months! It would be especially ideal for adding a few decorations outside during the warmer season for a little gathering or BBQ. Simple yet sophisticated, this garland works well in both formal and more casual settings.


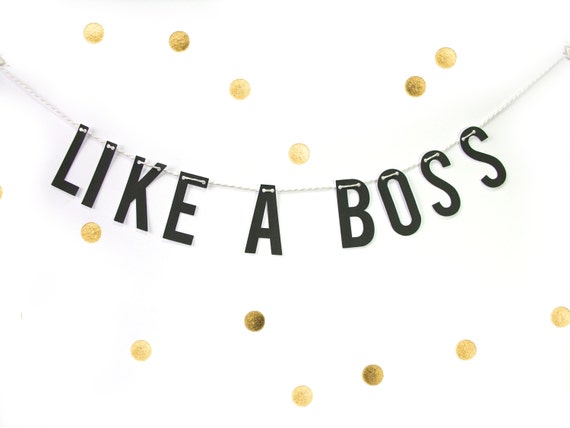
4. Word Banners: Like a Boss Banner from All Her Glory


Technically a banner not a garland, but these word banners are so on trend right now and for a very good reason. This banner would be the perfect motivation for a studio or office space, especially for all those #girlbosses out there!


I'm going to step away from the computer now to grab a snack and get a little fresh air, so I'll see you all again soon!


LIFE HACK: WAFFLE IRON PANINIS

Monday, 23 March 2015


Love paninis but don't have a panini maker or press? If, like me, you have a waffle iron lurking away in the depths of your kitchen cupboards, it turns out they do exactly the same job.

Around a year ago I impulse bought a waffle iron (for what reason I shall never know, I think at the time I thought 'oh it would be so cool if I could make waffles at home!'). As a result, I've used it a grand total of once (I know, I know), and one day just decided maybe I could try it out for paninis too. I mean, with the exception of the grid markings, it pretty much does the same thing, right? Like we all do, I turned to Google to investigate further and it turns out it's actually a thing.


I decided on mozzarella and red pesto, the best combination known to man, and Eloise went for cheddar cheese and salami with sweet chilli sauce. The photos really don't do the taste of them justice because it was serious nommage. We also decided to have chips alongside as it was a joint lunch/dinner thing (too late for lunch but too early to have dinner), a well known naughty but nice match made in heaven.

If you're a panini addict too, let us know your favourite combinations below!

Running a Business Whilst Managing Chronic Illness

Saturday, 21 February 2015

I've been wanting to write a post about this for so long and fear has absolutely put me off.  Fear of opening myself up to criticism, discrimination, judgement and more. There is still so much stigma attached to mental illness, so if this gets deleted, don't be surprised. Publishing this is a risk to me professionally and personally, as so few people close to me even know. My main reason for this is to provide inspiration and reassurance to others in a similar situation, so here it goes.

I'm disabled. Not disabled in the way people imagine a disabled person to be. I don't have a wheelchair. I am able bodied. No, since I was 12 years old, I've suffered from major depressive disorder and social anxiety, and more recently, been diagnosed with an ED and emotional instability personality disorder (something which in itself, is highly stigmatised). For me, working in full time or even part time work is challenging. In my life, I've been in hospital multiple times for suicide attempts, had a stay in an inpatient unit and have even once been sectioned. Whilst I very likely could get signed off work and get benefits (which is a perfectly reasonable option to take), I so desperately want to work and be as independent as I possibly can be, so instead, I have created my own job whilst I get back on my feet.

Working from my home can be both a godsend and a curse. It suits me as I can work it around my chronic illness, so on my bad days, I don't have to feel guilty about calling up sick to an employer. I'm my own boss, so instead I simply adjust my hours accordingly. On the other hand, I have a responsibility to meet deadlines for customers. I'm extremely lucky in this instance. Firstly, I try to plan in advance and give myself enough time to allow for falling ill. Secondly, my lovely Eloise does the bulk of the shipping, so will work more hours when I'm unable to. Creating your own business around illness involves a lot of organisation and managing the particular challenges you may face as a result, but with prior planning and a bit of experience, you slowly get to grips with the adjustments necessary for you to manage the two together.

There are some limitations that still do affect me and I have missed out as a result. Unfortunately because of my anxiety I don't attend many (if any) craft fairs, which I so desperately wish I could. There have been a few opportunities to collaborate with other makers involving meet ups, which I also declined as I knew how difficult it was for me. This isn't the be all and end all however, I have also worked with a number of people via the internet, such as a Little Bundle, and have made strong friendships through a number of crafting groups.

In the future, we aim to work with more charities, but of course, mental health charities, and in particular Mind, will always be our main choice, as it's something I'm really passionate about and is very very close to my heart.

I hope this post may help some people and if anyone wants to talk to me for advice on setting up a business and working around a disability, you're more than welcome to!

FAQ: FAVOURITE PHOTO APPS

One of the questions I'm asked the most is what photo apps I use and how I get them to look so good. For those of you that don't know me, I'm incredibly lazy and guarantee a good 90% of the photos I share have been taken on my iPhone. It's convenient, quick and easy to use. I have a good DSLR at the ready, my trusty Canon 40D, but sometimes it's just not ideal to carry round. So, here is how I edit my photos!

First, I'll show you a before and after of a photo I took on my phone this week.


The difference isn't huge as I like my photos not to look overly edited but it's definitely there. The first image is much duller and the wood pieces don't stand out, whereas in the second, the colours show up brighter, the illustrations more vivid and the wood pieces stronger. In this one, the tokens look far more like how they look in real life than in the original shot.


1. A Beautiful Mess (ABM)
This little app is super handy for a number of reasons. First, adding pretty text! This was really the main reason I downloaded it in the first place - it has lots of pretty text and graphics and is much faster than adding overlays to images on your phone. Secondly, I really love the filter Poppy. I use this one quite often just to brighten up my image. When you take photos on a white background such as paper, often it can come up quite dark and grey, and this filter is perfect for really brightening up the background without affecting the main objects too much.

2. Afterlight
This app is one of my most used and well worth the small fee to download. I use this app probably the most to add filters, crop and adjust lighting levels. One of my favourite filters on this app is Glacier under the original filters section and, very occasionally, Nico and Dallas. I rarely put filters on to 100% as they can be a little harsh. Rather I may use one or two filters on the same photo but on a low level, just to enhance it.

3. Mextures
I occasionally use Mextures to add some unusual effects to my photos or to brighten them up. On here, Frosted under Landscape Enhance is definitely my most used but I do occasionally add other effects, like grain and coloured filters.

4. VSCOcam
I've used VSCOcam less and less recently and have relied more on ABM, Afterlight and Mextures, but every so often I do come back to this little beauty. VSCO does have a number of really really lovely filters, so although I use it less often than I did, I still can't bring myself to delete it off my phone.

Finally, just to bring this blog to a close, if you're looking to edit photos into shapes (occasionally I will crop mine into circular shapes), Krop Circle is the best app for the job. I prefer leaving my photos in the classic square format but if you're wanting to mix things up a little, this app is ideal!

If you have any apps you'd like to recommend to others, leave them below in the comments and let me know what you think!

DIY: Cheap and Easy Five Minute Pegs!

Monday, 16 February 2015


The weather is getting better, plants are starting to appear and it's time for that dreaded spring clean! However, if you're anything like me, you've just paid off a bunch of bills and don't have a lot of spare cash.

One of my current favourite DIYs are these super easy and cheap magnetic pegs, perfect for pinning up important letters, things you need but constantly lose or your little one's drawings. You can make them as decorative or simple as you like, using paint, washi tape, buttons and resins. 


I'm quite minimalist in my style so I went for a simple colour block in my absolute favourite colours - bright pink, mint and gold. I used spray paints, due to their relative ease and affordability. I'm going to be planting soon and have a bunch of tin cans ready for me to paint up, so spray paints are always super handy to have around the house to add a quick splash of colour to otherwise plain bits and bobs. 


Another good colour choice would be copper. Copper accents are currently my absolute favourite and Rustoleum do a reaaaaally good copper spray paint. I used gold for these as my copper paint is currently running low, but you can't go wrong with any splash of metallic!


To do this, literally all you need are:

- Wooden pegs (which can be found at your local pound shop or supermarket)
- Magnets (optional) 
- Paint, washi tape or other embellishments

I put magnets on the back of mine so I can pin them on my fridge and boiler, but another quick and easy alternative is to hang some twine or pretty ribbon up and clip them on. 


Know any other good cheap organisation DIYs? Leave your suggestions below in the comments!


Cold Winter Days: A Perfect Afternoon In

Tuesday, 16 December 2014

This is, sort of, our first official ever blog post!

It seems fitting somehow that the topic be food, rest and relaxation. After a hectic month getting all your lovely orders out, we decided to take a little indulgent self care day! And on the cards? Of course, it had to be Christmas movies, hot chocolate and a tonne of blankets to snuggle in.


We decided to make some hot chocolate stirrers (albeit nowhere near as Mello Mallo's fluffy mallow goodness, you can order some from her here: https://www.etsy.com/shop/mellomallo).


Firstly, I dug out my handy fondue set, a couple of big mugs, hot chocolate, marshmallows, sprinkles and some straws. I actually chose some really nice Belgium caramel hot chocolate I was bought although I did contemplate hot drinking fudge.


What I love about hot chocolate stirrers is they're so delicious yet quick and easy to make. All you really need is marshmallows and for a little bit extra, some chocolate or sprinkles. I would really recommend getting Mikado or Pocky for your stirrers, but as we didn't have any in, we made do with paper straws! Note: we even chose classic red stripes, in keeping with good ol' festive spirit.

If you have any Christmas mugs, grab them! I love Cath Kidston mugs, particularly the old style, as they're so big - more hot chocolate for me! I have had my eye on some adorable festive mugs from some fellow Etsy sellers, which I can link below if you'd like.


Now, all you need to do is pop the kettle on, put your straws or pocky sticks in the marshmallows, melt your chocolate, dip them and viola! There you have it.


What would make this your perfect lazy day in?